


製品パンフレットを無料で入手できます!
無料の製品パンフレットをご希望の方はこのボタンをクリックしてください。


12"/31 cmホイール • 座席 • グリップの高さ 82-102 cm • 高さ 185-205 cm • コンフォート シート、バスケット ・雨カバー


 は、世界中で主要な支払い方法です。")

Veloped Tourでは、毎日の快適さと実用性をお楽しみいただけます。公園に散歩をしたり、買い物や日常生活のために非常に適しています。広々としたバスケットは、スーパーマーケットから食料品を積み込んで、帰宅させることは、クライミングホイールと空気入りタイヤのメリットを享受できます。
新しいモデル: 新しいVeloped Tour 12er Lは、前のモデルよりも1.2kg(2.6ポンド)軽くなっています。
最適な着座の快適性を提供するために、シートの深さは30cmに増加しました。
Veloped Tourは、ヨーロッパのロレーター/歩行器基準(ISO-11199)に従ってテストされ、承認されています。CEマーク取得
外形寸法・重量 |
|
|---|---|
| サイズ | L |
| グリップの高さ | 82-102 cm |
| 高さ |
185-205 cm |
| 最大ユーザー重量 |
150 kg |
| 保証 | 10 年間 通常の消耗品を除く |
| すべての寸法、重量、およびこのモデルのすべての技術的詳細を表示するには、上記の2番目のタブをクリックしてください。 | |
 |
|
すべてユニークであり、異なる好みと要件を持っています。注文進地トレッキングをニーズに合わせてカスタマイズするため、タイヤ、チューブ、グリップから選べます。
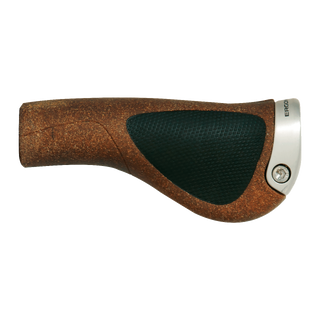
異なるグリップオプションでコックピットをカスタマイズします。Ergonのグリップは、2 つの材料、ゴム、BioKork、および 2 つのサイズを提供していますS (6.5 8.5) と L (8.5 12.0)。
グリップオプション »Veloped Tour 12erには以下の機能と特徴が備わっています:

大きなホイールは、単に小さなホイールより優れたパフォーマンスを出します。12 "/ 31cmの大きな車輪を使用すると、障害物や荒天にも対応し、平らな面でも快適性が向上します。
なぜ大きな車輪なのか? »
伸縮式折りたたみボタンを押すと、Velopedを2つのステップで折り畳むことができます。途中まで折りたたんだときは、それを押すとまだ転がっていて、狭い出入口などを簡単に通過することができます。
Learn how to fold »
ユニークで、特許を取得したTrionic Climbing Wheelを使用すると、Velopedをまったく持ち上げることなく、縁石、岩石、根などの障害物を最大13cmまで簡単に克服できます。
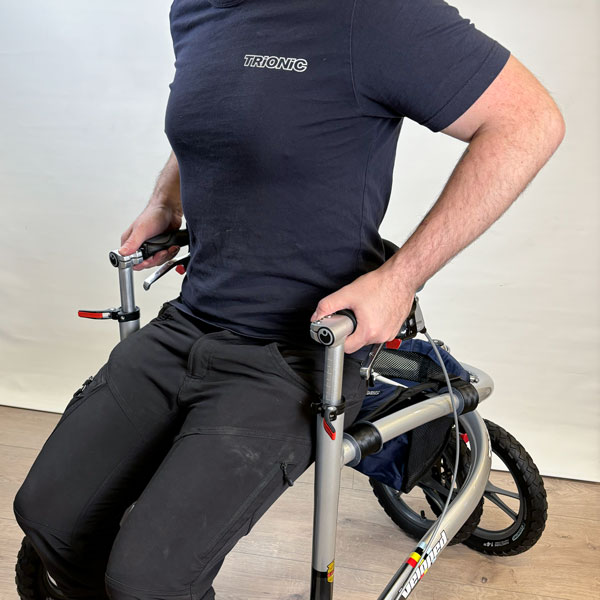
なぜ大きな車輪なのか? »シートを前方にスライドさせると、Velopedはフレーム内に十分な歩行スペースを提供します。グリップハンドルの近くまで歩くことができるようになり、自動的に直立し、人間工学的に正しい体の姿勢になります。 U字型と人間工学に基づいたグリップバーは、いくつかのグリップポジションを提供し、座っている間はバックサポートとして機能します。グリップバーは身長に合わせて自由に高さ調整が可能です。
その他の利点 »

Veloped Tour 12erには、より柔らかい乗り心地と最高の快適性を提供する空気圧タイヤが装備されています。ソリッド タイヤが引き起こすような振動は発生しません、痛みや不快感に苦しむことは減るでしょう。
素晴らしい快適性 »
Trionic All-Terrainハブブレーキシステムのおかげで、日差しの中を歩いたり、雨や雪が降ったりしても、常に最適なブレーキ性能を利用できます。ブレーキは汚れ、水、雪から完全に保護されています。
オプションの安全性 »
全アルミニウムブレーキレバーは、堅実で高品質の感触を提供します。パーキングブレーキを作動させると、パーキングトリガー操作は簡単で、3種類のオプションがあります。
モーション- & パーキングブレーキ »
最適な着座の快適性を提供するために、シートの深さは30cmに増加しました。長いコンフォートシートは、硬質のプラスチック製のインサートと組み合わせて、足に沿って十分なサポートを提供します。
広いバスケットには小物用のジッパーポケットがあり、レインカバーが一体化されています。
取り外し可能なレインカバーもVeloped Tourに付属しています。
色 ブラック/反射/赤 テキスタイルキットについて詳細 »

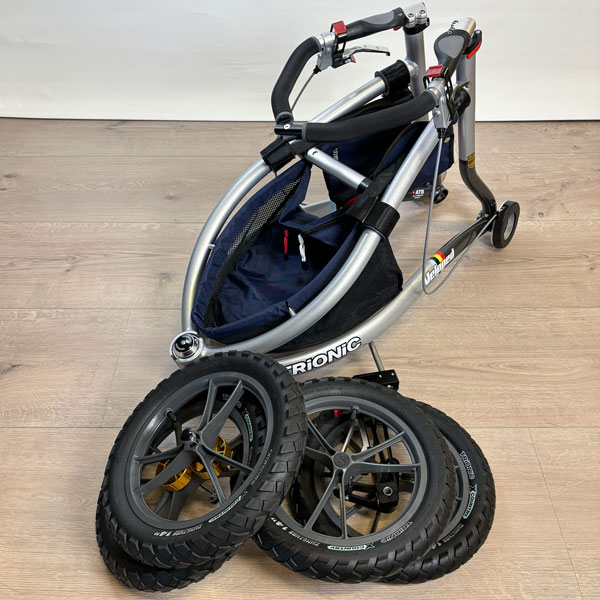
Veloped Tour 12erはプッシュボタンのクイックリリースアクスル、取り外し可能なホイールを備えています。輸送重量と寸法を最小限に抑えるために、ホイールを素早く簡単に取り外すことができます。
あなたの車にロードする »
Ergon GP1 グリップは非常に快適なグリップを提供しています。人間工学に基づき、重量を均等に配分します。グリップは角度調節可能で、サイズ S ・ Lに適応します。
Ergon GP1グリップ. »
特許取得済みのクライミングホイールと相当に大きな車輪を備えた3輪駆動車の設計により、Velopedは世界で唯一真のオフロードが可能なWalker/Rollatorです。不安定で荒い地面を歩いているときは、いつもVelopedがサポートします。
オフロード対応 » »
ベロップドは、強くてクールでモダンなアルミニウムフレームを採用しています。フレームは、ハイドロフォーミングされた独自の6061-T6合金チューブを溶接したもので、長年のハードな使用を保証します。2色のメタリックペイントワークとクールなステッカーキットで、見た目の美しさも抜群です。

トリオニックは長年にわたり、ネジ、ナット、ワッシャー、アクスルシャフト、ステンレススチールから作られた小さな部品を使用しています。 ベロップドとウォーカーにもステンレス製のクイックリリースアクスルを備えています。

パンク保護、スキンウォール、反射ロゴ、そしてしなやかで非常に強い高品質の60TPIの織りにより作られたカーカス。トリオニックXカントリータイヤは、軽量化、快適性の向上、グリップ力の向上を実現しています。
| 外形寸法・重量 | |
|---|---|
| フレーム サイズ: | L |
| グリップの高さ (調節可能な): | 82 - 102 cm |
| 推奨する高さ: 185 - 205 cm | |
| 長さ: | 102 cm |
| 幅: 79 cm | |
| グリップ幅 (センター): | 48 cm |
| シートの高さ: | 63 cm |
| シートの幅: | 44 cm |
| シートの奥行き: | 30 cm |
| 寸法折り返し | |
|---|---|
| 高さ: | 82 cm |
| 長さ: | 106 cm |
| 幅: 42 cm | |
| 輸送寸法 - 車輪なし折り返し | |
|---|---|
| 高さ: | 68 cm |
| 長さ: | 84 cm |
| 幅: 42 cm | |
| 輸送重量 - 車輪なし | |
|---|---|
| 輸送重量: | 8,0 kg |
| ユーザーの重量 | |
|---|---|
| 最大ユーザー重量: | 150 kg |
| 製品の重量 | |
|---|---|
| 総重量: | 12,2 kg |
| 繊維部品 - 座席・ バスケット | |
| シート ・ ベース: | 600 D ポリエステル、撥水の w。逆側の PU カバー |
| シートカバー: | 600 D ポリエステル、撥水の w。逆側の PU カバー |
| バスケット: | 600 D ポリエステル、撥水の w。逆側の PU カバー |
| リフレクタ: | 3 フレーム- ・ 2 グリップ反射 |
| ホイール | |
| ホイール サイズ: | 12/31 cm |
| タイヤの種類: | 空気圧/タイヤ + インナー チューブ |
| タイヤ: | 穿刺保護 w. Trionic X-カントリー |
| チューブ: | ブチルゴム w。シュリーダー/車のバルブ |
| タイヤ寸法インチ: | 12 x 2.2" |
| タイヤ寸法 mm: | 310-57 (外側直径幅) |
| 車輪の縁: | PA6 + 15 %gf 射出成形リム wガラス繊維強化高級ナイロン プラスチックから作られた 3 × 2 スポーク |
| ボール ベアリング: | 61901-2RS1 / 61802-2RS1 |
| タイヤのオプション: | • シュワルベ ビッグアップル • 大陸 TourRide |
| フレーム ・ フォークサスペンション | |
|---|---|
| フレーム: | ハイドロフォーム、TIG溶接、T6熱処理アルミニウム管(プラスチック部品なし)で作られた6061-T6アルミニウム |
| フォークサスペンション: Trionic 登山ホイール - 特許取得済み押出成形された6061-T6アルミニウム製部品 | |
| ヘッドセット: | Trionic システム w2 ボールベアリング |
| ブレーキ | |
|---|---|
| ブレーキ: | Trionic All-Terrain ハブブレーキ |
| ブレーキ レバー: | Trionic アルミニウム製ブレーキレバーwKratonラバーフィンガー表面 |
| ブレーキ機能: | モーション ・ パーキング ブレーキ |
| グリップ バー ・ グリップ | |
|---|---|
| グリップ バー: | 6061 T6 アルミニウム (プラスチック パーツ) |
| グリップ: | Ergon GP1 グリップ サイズ L 8.5-12 ・調節可能&人間工学 (角度) |
| (アップグレード) グリップのオプション: | Ergon GP1 サイズ 6.5 8.5 S • Ergon GP1 BioKork サイズ S 6.5 8.5 • Ergon GP1 BioKork サイズ L 8.5-12 |
この製品のマニュアルには、以下のマニュアルと手順が含まれています。オンラインでドキュメントを表示するか、ローカルで使用するためにドキュメントをダウンロードするかを選択できます。
Velopedはユニークな3輪設計ですが、ご覧の通り、実際には4輪です。 特に、屋外で活発に活動したい方向けの歩行補助具として使用することを目的としています。 歩行と、ユーザーのアクセスを円滑にすることを重視して開発されたVelopedは、唯一無二の製品です。 主な特徴は、高さ13cmまでの障害物を乗り越える能力を持つデュアルフロントホイールです。従来のホイールと比較して、より小さな障害物を乗り越えるために必要な力も大幅に軽減されます。3輪設計と前輪のサスペンション、空気の入ったタイヤが相まって、あらゆる凹凸のある路面で快適性とアクセスのしやすさの両方が向上します。
Veloped は、最大ユーザー体重 150 kg に対して、国際規格 ISO-11199-2:2005 に従ってテストおよび承認されています。
| 12er M | 12er L | 14er M | 14er M | |
|---|---|---|---|---|
| 最小高さ: | 75 cm | 82 cm | 77 cm | 84 cm |
| 最大高さ: | 95 cm | 102 cm | 97 cm | 104 cm |
| 幅: | 76 cm | 79 cm | 76 cm | 79 cm |
| 長さ: | 102 cm | 102 cm | 107 cm | 107 cm |
| シートの高さ: | 58 cm | 63 cm | 60 cm | 65 cm |
| シート幅: | 44 cm | 44 cm | 44 cm | 44 cm |
| ホイール サイズ: | 12"/31 cm | 12"/31 cm | 14"/36 cm | 14"/36 cm |
| 寸法折り返し: | L106xW42xH75 cm | L106xW42xH82 cm | L111xW42xH77 cm | L111xW42xH84 cm |
| 車輪なしで折りたたんだサイズ: | L84xW42xH59 cm | L84xW42xH68 cm | L84xW42xH59 cm | L84xW42xH68 cm |
| 輸送重量 (Sport): | 11,4 kg | 12,0 kg | 11,9 kg | 12,5 kg |
| 輸送重量、車輪なし: | 7,7 kg | 8,3 kg | 7,7 kg | 8,3 kg |
| 最大ユーザー重量: | 150 kg | 150 kg | 150 kg | 150 kg |

多くの歩行器ユーザーは、より直立した姿勢を促進できると考えて、グリップを高く設定しすぎます。しかし、これは実際には姿勢を悪化させ、安定性に悪影響を及ぼします。
すべての理学療法士とすべての歩行器メーカーが推奨しているように、次の手順で Veloped の正しいグリップの高さを決定できます。
1. 後輪の中央にある黒いボタンを押し、車軸を車軸穴の奥まで押し込んで、後輪をフレームの後車軸穴に取り付けます。押しボタンを離します。

2. 車輪を横に引いたり押したりして、正しく取り付けられていることを確認します。

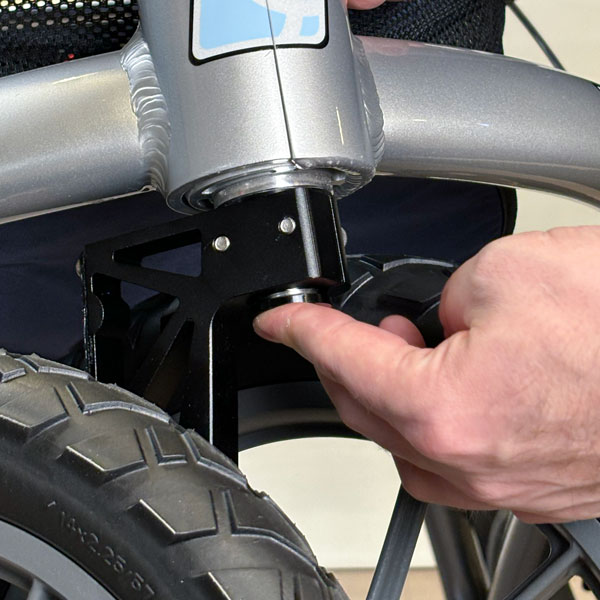
3. 同じ方法で、前輪サスペンションをフレームの前下端に取り付けます。つまり、車軸の下部にある黒いボタンを押し、車軸を下から車軸穴に押し込みます。押しボタンを離します。
4. フレームを地面から持ち上げ、前輪を下に引いて、前輪がしっかりと固定されていることを確認します。
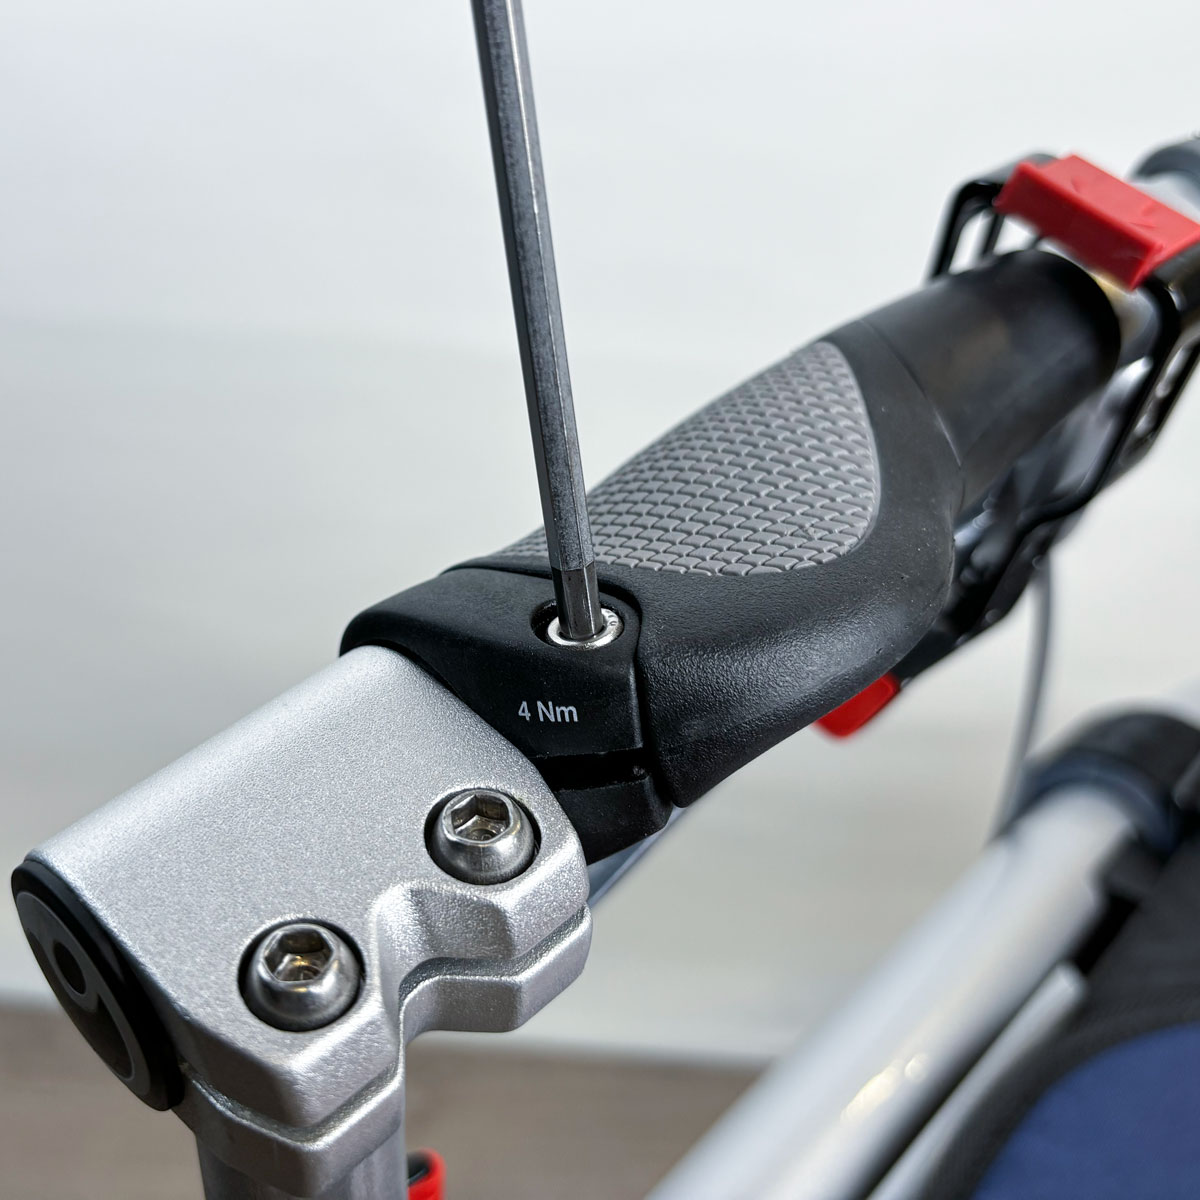
5. クイックリリースレバーを開き、「正しいグリップの高さ」の章の説明に従ってグリップの高さを調整します。
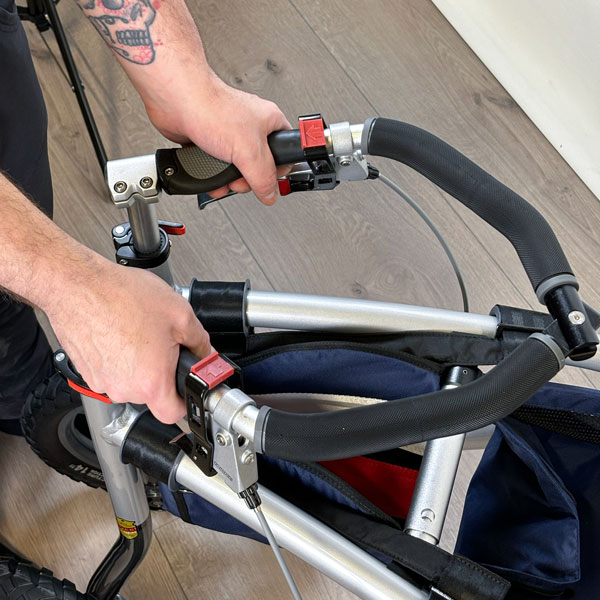
パーキングブレーキは 3 つの方法で作動できます。
オプション 1: 人差し指で下部の赤いパーキング トリガーを押し下げながら、同時にブレーキ レバーを引きます。パーキング ブレーキがかかっており、Veloped が動かないことを確認します。
オプション 2: 親指で上部の赤いパーキング トリガーを後方に引き、同時にブレーキ レバーを引きます。パーキング ブレーキがかかっていることを確認します。
オプション 3: 両手を使用します。片方の手で上部の赤いパーキング トリガーを後方に引き、もう一方の手でブレーキ レバーを引きます。パーキング ブレーキがかかっていることを確認します。
パーキングブレーキを解除するには、モーションブレーキを使用する場合と同じ方法でブレーキをかけます。
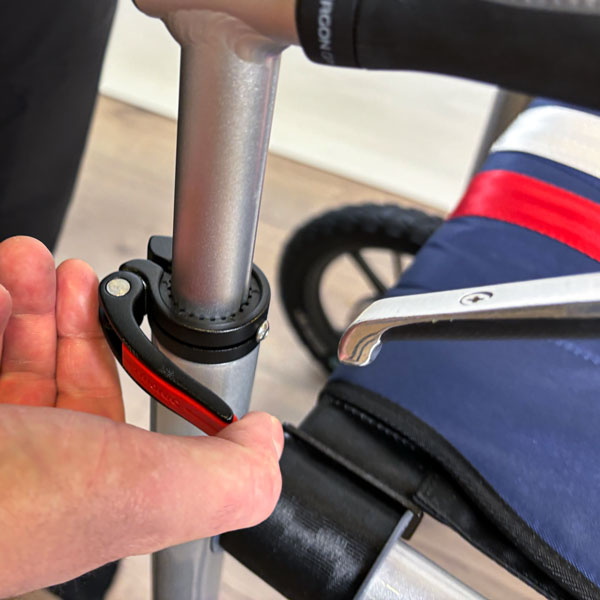
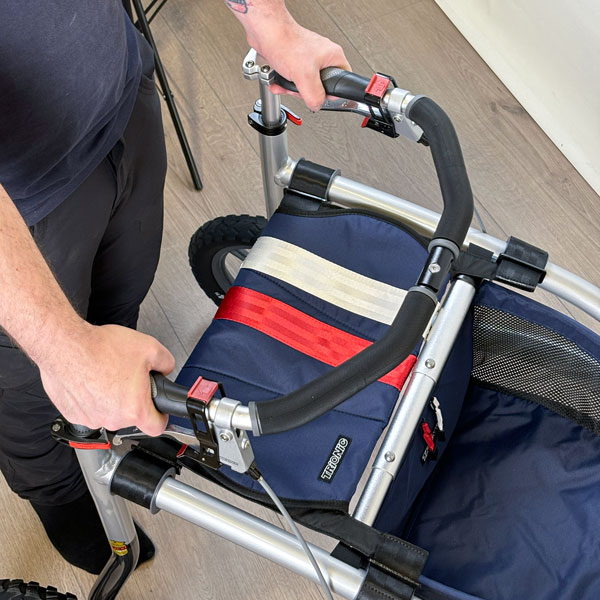
両方のクイックリリースレバーを外側に折りたたんで解放します。
グリップバーを必要な高さに調整します。最も適切な高さは、腕を自由に垂らした状態で立ったときの手首から地面までの距離です。測定には補助を使用してください。
注意: グリップバーを調整する最も簡単な方法は、シートに座っているときです。こうすることで、高さ表示マークがはっきりと見えるため、高さ調整が簡単になります。

両方のクイックリリースレバーを内側に折りたたんでロックします。

注意! クイックリリースレバーを蝶ナットやネジのように操作しないでください。Veloped の使用中にユーザーが誤ってレバーを外すリスクがある場合は、クイックリリースレバーをネジとナットに置き換えることができます。
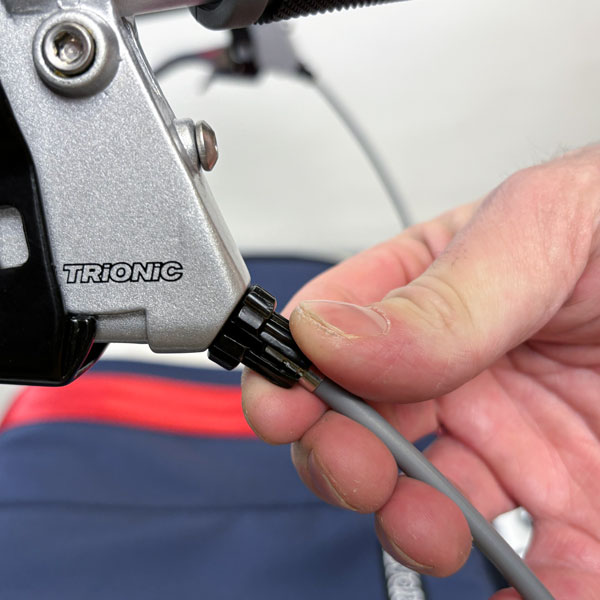
ホイールには、簡単なステアリング用と方向安定モード用の 2 つの設定があります。前輪の車輪の間に調整ハンドルがあり、この 2 つの設定を切り替えることができます。
登坂能力を維持しながら、簡単に旋回できます。
登坂能力が向上し、不均一な路面でもサスペンションが効き、方向安定性が向上します。Veloped は操縦が難しいですが、オフロードでのパフォーマンスは優れています。
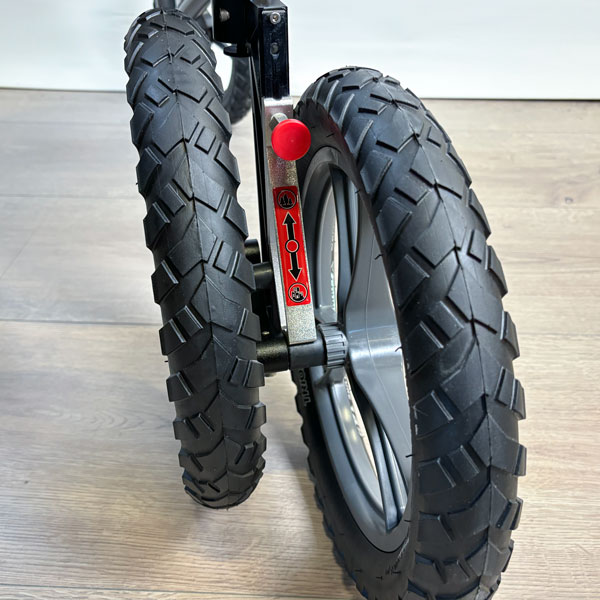
調整ハンドルに簡単にアクセスできるように、前輪を 180 度回転させます。

1. 左手で左の車輪をつかみ、Veloped の前端を地面から少し浮かせます。
2. 左手で Veloped を持ち上げた状態で、右手で赤いノブをつかみ、外側(手前)に引きます。
3. アジャスター(右側)を下または上にスライドします。アジャスターを一番下または一番上の位置までスライドさせることが重要です。
4. 赤いノブを放すと、ノブが跳ね返って前輪が選択した設定にロックされます。
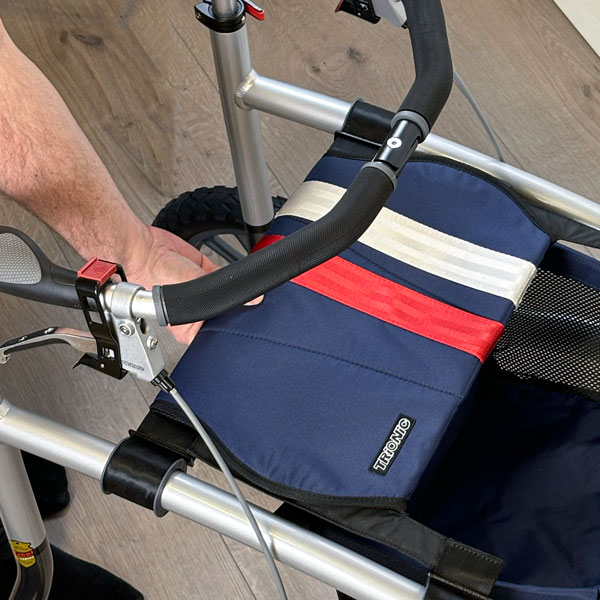
Trionic Veloped のバスケットの積載容量は 22 リットルです。後端には貴重品や小さな物を入れるための小さなジッパー付きポケットがあります。Veloped のバスケットは取り外し可能で、3 つのベルクロ セクションでフレーム バスケット レールに取り付けられています。
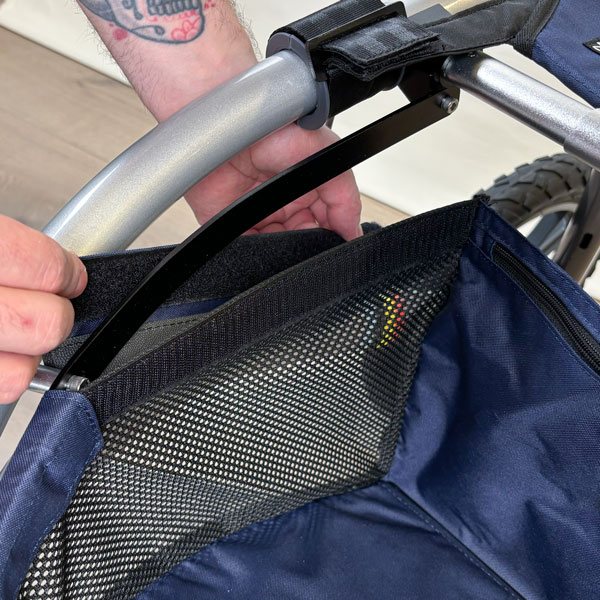
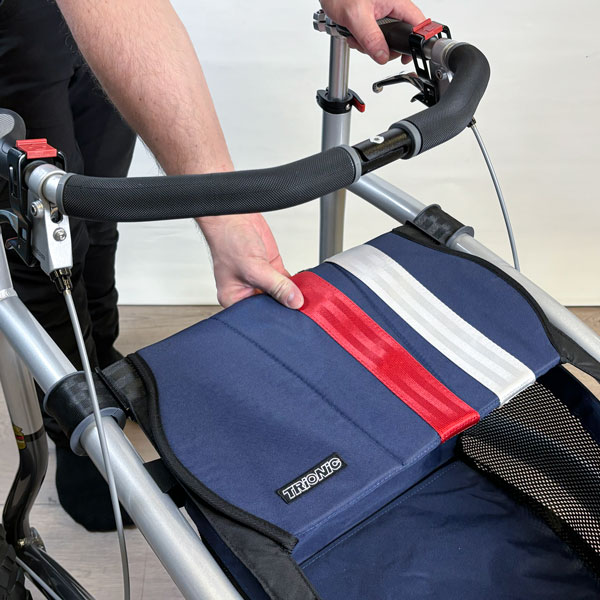
1. 後部のベルクロ フラップを、フレームとバスケット レールの間の下からレールの周りに巻き付けます。内側に折り曲げて、ベルクロ部分をバスケット ライニングの内側に固定します。

2. 前面のベルクロフラップも同様の方法で取り付けます。
3. 必要に応じて、ベルクロ部分を調整して、バスケットが適切に固定されていることを確認します。
注意!バスケットをフレームに取り付ける前に、バスケットの下部スリーブにプラスチックプレートを必ず挿入してください。
使用する前に、Trionic Veloped が正しく機能していることを確認してください。
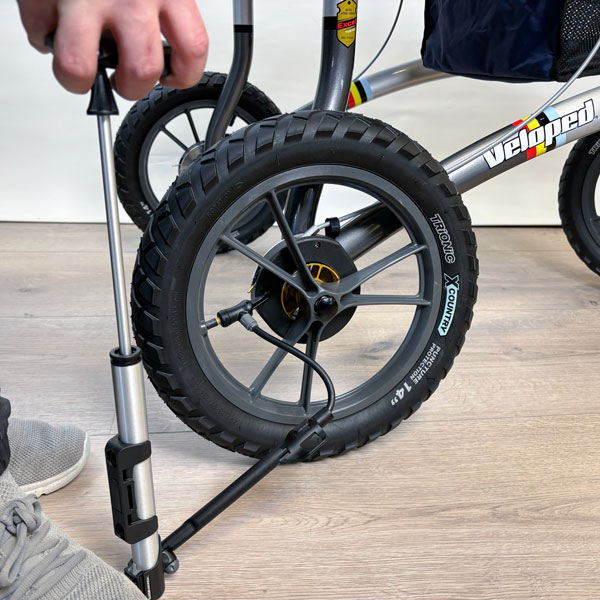
機能と安全性を維持するために、次の作業を定期的に実行してください。
4〜5週間ごとにタイヤの空気圧をご確認ください。Trionicは1.5バール/22psiのタイヤ空気圧を推奨しています。
Trionic は、事前の許可なく製品に行われた変更 (調整または不適切な修理) については責任を負いません。
 Trionic Veloped には、通常の摩耗の影響を受ける部品 (タイヤ、チューブ、ブレーキ パッド、ブレーキ ケーブル、ブレーキ ケーブル ハウジング、グリップ、繊維部品) を除き、10 年間の保証が付いています。保証は購入日から有効で、Trionic のオリジナル部品のみを対象としています。
 CE - Trionic Sverige AB は、上記の製品が医療製品に関する関連法規制要件 (1993:584) および医療製品規定 (LVFS 2003:11) に含まれる仕様を満たしていることを保証します。製品は、医療技術製品に関する EC 指令 93/42/EEC の仕様を満たしています。
Veloped は、歩行器に関する国際規格 ISO 11199-2:2021 に従ってテストおよび承認されており、医療機器に関する EU 規制 MDR 2017/745 の要件を満たしています。
使用者の体重は150kgを超えてはなりません。

Trionic Veloped は、ライフサイクル全体を通じて環境への悪影響を可能な限り少なくするように製造されています。製品が目的を果たせば、廃棄して部品をリサイクルすることができます。

Trionic Sverige AB は、アイルランドの Repak Ltd および英国の Valpak Limited のメンバーであり、1994 年 12 月 20 日付けの欧州包装および包装廃棄物指令を完全に実施しています。
とても良いので2つ目を購入しました…
農場に住んでいて馬も飼っているので、Veloped Sportを購入しました。とても満足していて、安心して使えると感じました。ただ、病院の予約や車に積み込む時など、少し大きすぎると感じました。そこで、歩行器も購入しました。車輪の部分が少し残念で、Veloped Sportと同じだったらよかったのにと思っています。私たちは老姉妹で、持病を抱えながらもアウトドアライフを維持しようと努力しています。…
トリオニック・ヴェロペッド・ツアー…
Veloped Tourにとても満足しています。
品質とデザインが素晴らしく、耐久性も高く、押しやすいです。
最高のカスタマーサービスです。
ありがとうございます。
マイケル
(北アイルランド)…
V・シンプソン…
新しい歩行器にとても満足しています。凸凹道や石畳も楽々と歩けますし、轍に引っかかる心配もなく、以前よりずっと楽に歩けるようになりました。ありがとうございます。
注文も簡単で、届いた商品も素晴らしい状態でした。…
いまだに満面の笑みを浮かべています。…
私がTrionicのVelopedを購入してから9か月近くになります。これまでのところ今までに私がした中で最高の投資です。短い距離しか歩けなくても(L4/L5の椎間板ヘルニア、股関節の変形性関節炎、肥大性心筋症を患っています)、地元の国立公園の森林道を6~8Km歩くことができます。5分毎に休憩が必要ですが、その時にはシートが役立ちます。私は自然が大好きで、機会があればすてきな森に出かけるようにしています。そして、このアウトドア歩行器が自然の中を楽しませてくれます。そして、これが全てです・・・EN…
素晴らしい歩行補助具…
Velopedは、とても丁寧に梱包され、完璧な状態で、あっという間に届きました。セットアップもとても簡単で、たった5分で完了しました!
夫はVelopedを気に入っており、歩くたびに使っています。それ以来、以前の2倍の距離を、全く痛みを感じることなく、ずっと楽に歩けるようになりました。小さなシートに寄りかかることができるのは大きなメリットで、ベンチがない(という問題)という問題から解放されます。
驚くほどスポーティなデザインと操作性も、夫にとって決め手となりました。彼は要求が厳しく、「普通の…
ハインリヒ・ハイス、72歳…
私のVelopedは素晴らしいと思っています。毎日1時間犬の散歩をしていますが、以前は20分で腰がひどく痛くなっていました。今では痛みを感じずに歩けます。犬と一緒に10キロのハイキングも何度かしました。私のVelopedは本当に目を引くもので、このようなデバイスはここでは知られていません。
改善点が1つあります。犬を手で引っ張らないことです。制御するのが難しいからです。ヒップベルトとフレックスリードを購入しました。これにより、常に犬と身体的な接触を保つことができます。Velopedにはリード用…
ついに再び歩けるようになった…
母がこの歩行器を買ってから、また散歩に出かけるようになりました。母の健康のためにこれまでした投資の中で、最高のものの一つでした。歩行器について聞かれるたびに、母は嬉しそうに歩き回り、行動範囲も以前より何倍も広がりました。
娘として、私も今の経験に心から満足しています。…